티스토리 뷰
반응형
프로젝트를 시작하고 잘 작동을 하는지 test를 하는 방법에 대해 알아보자. 나는 JPA를 사용할 예정이라 아래와 같이 테스트를 만들었다.

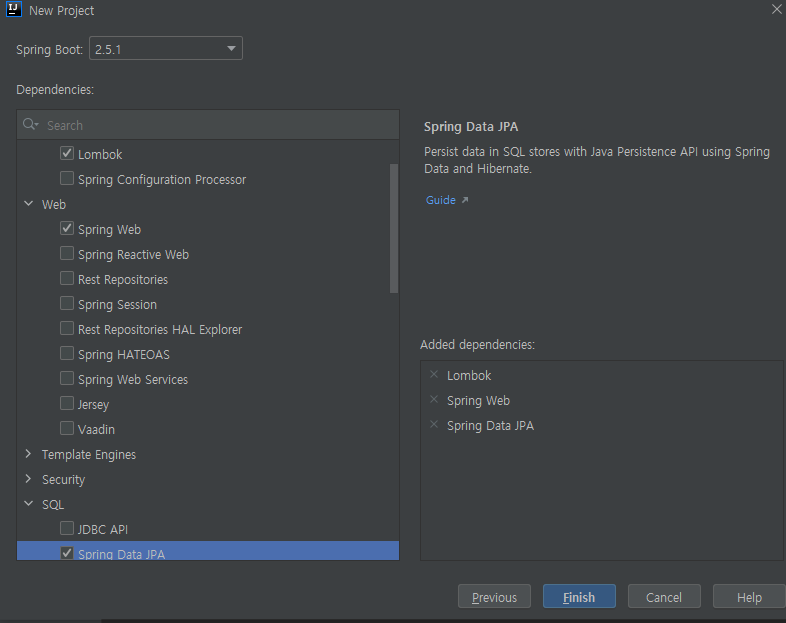
Dependencies는 Lombok, Spring Web, Spring Data JPA을 선택한다. 그리고 테스트 데이터베이스를 사용하기 위해 H2 Database도 추가로 선택해 준다.
finish를 누르자. 프로젝트가 생성 후에 build.gradle을 확인하여 의존성부터 확인하자.

dependencies {
    implementation 'org.springframework.boot:spring-boot-starter-data-jpa' // 우리가 사용할 것
    implementation 'org.springframework.boot:spring-boot-starter-web'  // 스프링 mvc 생성해서 API 생성
    compileOnly 'org.projectlombok:lombok'  //롬복
    runtimeOnly 'com.h2database:h2' // DB
    annotationProcessor 'org.projectlombok:lombok'
    testImplementation 'org.springframework.boot:spring-boot-starter-test' // 기본적으로 포함되어 있다
}
controller 패키지를 만들고 아래와 같이 HelloWorldController를 만들었다.

package com.hanpy.jpa.bookmanager.controller;

import org.springframework.web.bind.annotation.GetMapping;
import org.springframework.web.bind.annotation.RestController;

@RestController    //  rest API 요청을 받을 수 있다는 의미이다.
public class HelloWorldController {
    @GetMapping("/hello-world")     //http method를 get으로 받겠다는 의미이다.
    public String helloWorld(){
        return "hello-world";
    }
}
ctrl+shift+T : create new test를 누른다. 스프링 부트 2.2 부터는 JUnit5가 기본으로 채댁되었다.

OK를 눌러준다.
java 파일이 생성되면 @WebMvcTest로 mvc 테스트를 할 수 있도록 만들어 준다. 그리고 아래와 같이 테스트 코드를 작성해 준다.

package com.hanpy.jpa.bookmanager.controller;

import org.junit.jupiter.api.Test;
import org.springframework.beans.factory.annotation.Autowired;
import org.springframework.boot.test.autoconfigure.web.servlet.WebMvcTest;
import org.springframework.core.ReactiveAdapterRegistry;
import org.springframework.test.web.servlet.MockMvc;
import org.springframework.test.web.servlet.request.MockMvcRequestBuilders;

import static org.junit.jupiter.api.Assertions.*;
import static org.springframework.test.web.servlet.result.MockMvcResultHandlers.print;
import static org.springframework.test.web.servlet.result.MockMvcResultMatchers.content;
import static org.springframework.test.web.servlet.result.MockMvcResultMatchers.status;

@WebMvcTest  // mvc 테스트 가능하게 한다
class HelloWorldControllerTest {
    @Autowired
    private MockMvc mockMvc; // 정의해준다

    @Test   // Junit5에서는 Test를 적어줘야한다.
    void helloWorld() throws Exception {
        mockMvc.perform(MockMvcRequestBuilders.get("/hello-world")) // 아까 지정해 뒀던 get 요청을 test하겠다는 의미이다.
                .andDo(print())  // MockMvcResultHandlers.print가 static으로 import된 것을 확인할 수 있다.
                .andExpect(status().isOk()) // 200 응답을 ok 할것이다.
                .andExpect(content().string("hello-world"));  // 문자열을 리턴하는 것을 확인한다.
    }

}
그리고 @ Test 옆에 있는 재생 버튼을 눌러주면, 테스트를 시작한다.
프로젝트 시작전 테스트 확인을 한거다. 가독성이 좋게 만들어 졌기 때문에 대략적으로 이해가능 할 것이다.
반응형
'Platform > spring boot' 카테고리의 다른 글
| [Redis] 레디스 기초 개념 + 설치 + 구현 + 클러스터까지 (2) | 2022.10.20 |
|---|---|
| [spring boot] Object Mapper 파싱 (0) | 2021.06.29 |
| [spring boot] Object Mapper (0) | 2021.06.21 |
| [intellij] OpenJDK 64-Bit Server VM warning (0) | 2021.06.20 |
| [sping boot] response 방법 (1) | 2021.06.19 |
공지사항
최근에 올라온 글
최근에 달린 댓글
- Total
- Today
- Yesterday
링크
TAG
- error:0308010C:digital envelope routines::unsupported
- nextjs autoFocus
- useHistory 안됨
- next.config.js
- react
- pandas
- 자연어처리
- NextJS
- 자료구조
- read_csv
- 클라우데라
- Deque
- UserCreationForm
- mongoDB
- vuejs
- Vue
- nodejs
- react autoFocus
- typescript
- BFS
- login
- useState
- logout
- JavaScript
- Queue
- Express
- django
- Python
- TensorFlow
- DFS
| 일 | 월 | 화 | 수 | 목 | 금 | 토 |
|---|---|---|---|---|---|---|
| 1 | 2 | 3 | 4 | 5 | 6 | 7 |
| 8 | 9 | 10 | 11 | 12 | 13 | 14 |
| 15 | 16 | 17 | 18 | 19 | 20 | 21 |
| 22 | 23 | 24 | 25 | 26 | 27 | 28 |
글 보관함
